Examples
This section provides examples of how to use ShadowFI for fault injection tasks. Each example demonstrates different aspects of the framework, including configuration, execution, and analysis of results.
Benchmarks using CLI mode
The following sequence of steps illustate the interactive use of ShadowFI across a sequence of steps.
Run the CLI interface by typing the following command:
For singularity enabled systems
singularity run shadowfi_v1.sif
For local instalation NO singularity
# When not using singularity run the following commands
conda activate SHADOWFI
python shadowfi_shell.py
Note
More information about the CLI commands can be consulted in ShadowFI commands.
Create a new project:
Shadowfi> create --name TCU --design-config ./config/TCU/design_config.yml
[2025-07-25 03:51:38] INFO - Config copied to /home/test_env/shadowfi/projects/TCU/config.yaml
Configuration saved to /home/test_env/shadowfi/projects/TCU/config.yaml
[2025-07-25 03:51:38] INFO - Project TCU created at /home/test_env/shadowfi/projects/TCU
Shadowfi>
After executing this command the project
TCUis created under theprojectsdirectory. The following corresponds to the project directory structure:./projects/ └── TCU/ ├── config.yaml # The project information ├── logs/ #directory with final fault simulation results ├── sbtr/ #modified CUT files ├── src/ #temporary source files └── work/ # work directory
Elaborate the project:
Shadowfi> elaborate
...
Warnings: 1 unique messages, 1 total
End of script. Logfile hash: 9633524f2a, CPU: user 0.08s system 0.02s, MEM: 17.46 MB peak
Yosys 0.47+61 (git sha1 81011ad92, clang++ 18.1.8 -fPIC -O3)
Time spent: 48% 2x read_verilog (0 sec), 16% 2x write_json (0 sec), ...
Hierarchy saved to hierarchy.json
[2025-07-25 03:53:06] INFO - Elaboration completed.
Shadowfi>
Configure the fault instrumentation and run saboteur placing and routing:
Shadowfi> pnr --cmp-sel hierarchy --user-cmp-sel ./config/TCU/target_modules_3k.yml
...
Hierarchy saved to hierarchy.json
[2025-07-25 03:54:35] INFO - Number of target components: 1, Total bit shift: 1534
Configuration saved to /home/test_env/shadowfi/projects/TCU/config.yaml
[2025-07-25 03:54:35] INFO - Place and Route completed.
Shadowfi>
Configure and compile the testbench simulation:
Shadowfi> tb_setup --tb-config ./config/TCU/tb_config.yml
...
make[1]: Leaving directory '/home/test_env/shadowfi/benchmarks/Cores/TCU/TCU_2/tb/obj_dir'
- V e r i l a t i o n   R e p o r t: Verilator 5.031 devel rev v5.030-78-g5470cf9fa
- Verilator: Built from 1.654 MB sources in 25 modules, into 17.552 MB in 25 C++ files needing 0.018 MB
- Verilator: Walltime 38.198 s (elab=0.288, cvt=4.225, bld=33.160); cpu 5.488 s on 8 threads; alloced 196.203 MB
-- DONE -------------------------------------
[2025-07-25 03:56:47] INFO - Simulation setup for project TCU completed successfully.
Shadowfi>
Configure the fault simulation:
Shadowfi> fsim_setup --fsim-config ./config/TCU/sim_config.yml --run-script ./config/TCU/run.sh --sdc-check-script ./config/TCU/sdc_check.sh
...
[2025-07-25 03:58:07] INFO - Setting up fault injection for project: TCU
Configuration saved to /home/test_env/shadowfi/projects/TCU/config.yaml
[2025-07-25 03:58:08] INFO - Fault injection setup for project TCU completed successfully.
Shadowfi>
Run the fault injection campaign:
Shadowfi> fsim_exec
...
[2025-07-25 03:32:40] INFO - Running command:  bash /home/test_env/shadowfi/projects/TCU/.parsims/.job0/run.sh
[2025-07-25 03:32:42] INFO - Running command:  bash /home/test_env/shadowfi/projects/TCU/.parsims/.job0/sdc_check.sh
0,d_unit0@adder0,fpadd_3_pipe,0,1534,5,0,0,Masked

SDC: 0, Masked: 11
Fault simulation finished
[2025-07-25 03:32:42] INFO - Simulation execution complete.
Shadowfi>
Note
ShadowFI provides a basic scripting support, therefore the previous steps can be executed automatically by executing the following command:
For singularity enabled systems
singularity run shadowfi_v1.sif -s TCU.s
Benchmarks using GUI mode
ShadowFI provides an interactive GUI that allows an straighforward setup and execution of fault injections on arbitrary HDL designs.
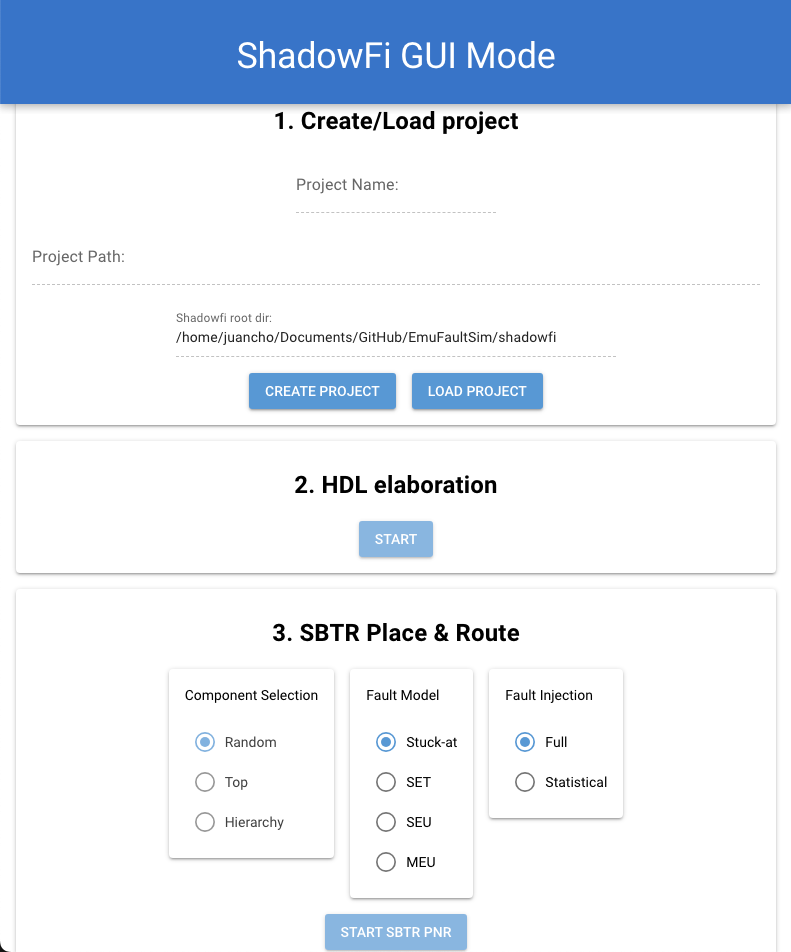
Intro to GUI usage
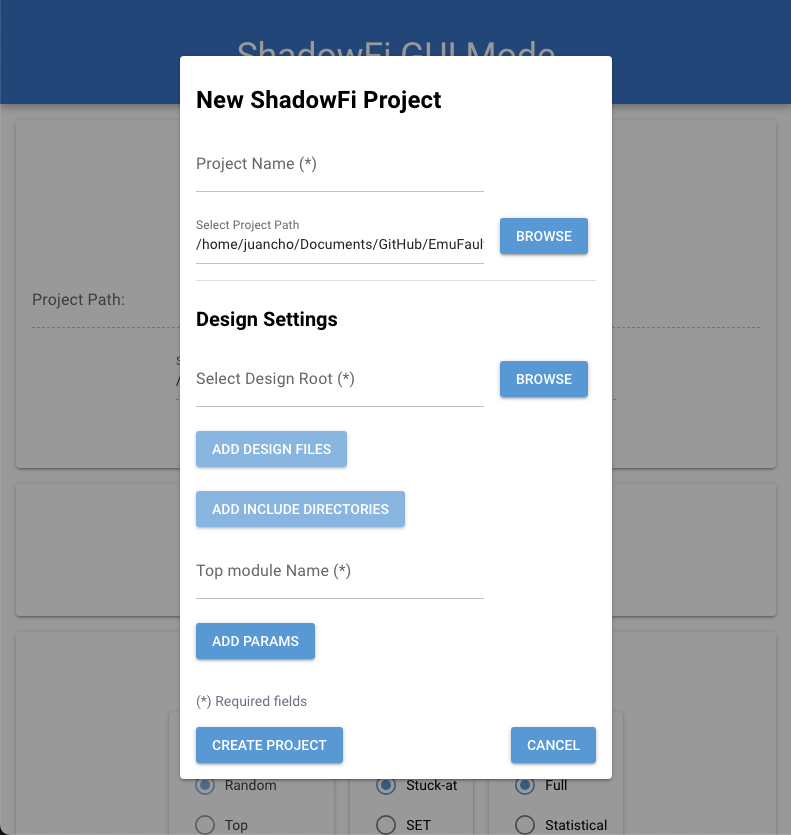
By pressing create project, a new popup window opens where th user can enter the project details as shown in the folowing picture.
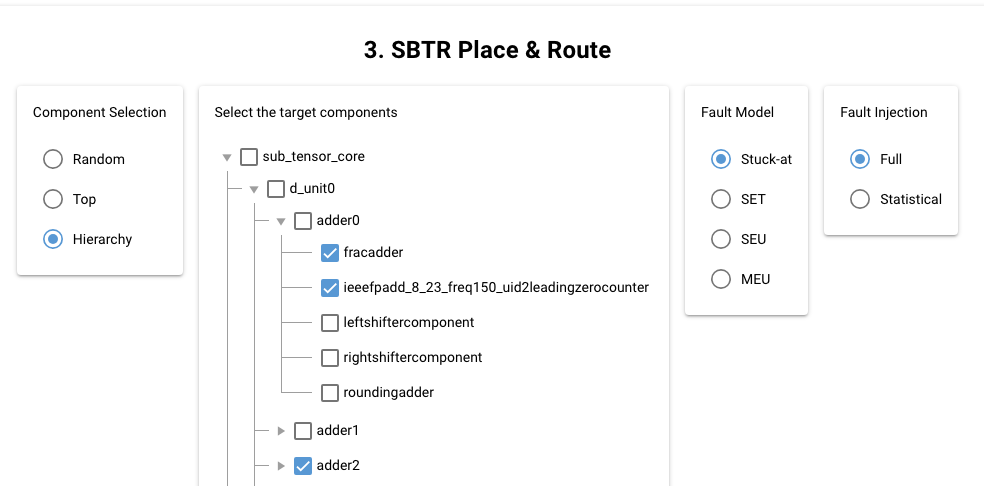
Once created the project, the user can press the “Elaborate” button to initiate the RTL elaboration pass. Then the user can select the fault instruemntation process, indicting the component selection. In the following figure we selected the “hierarchy” option and arbitrary selected three components, by default we selected “S@”” fault model and the instruemntation process was applied to all nets in the selected components. Then fault instrumentation processs initiate when the user presses the “START SBTR PNR”. Check out the next picture for ilustration.
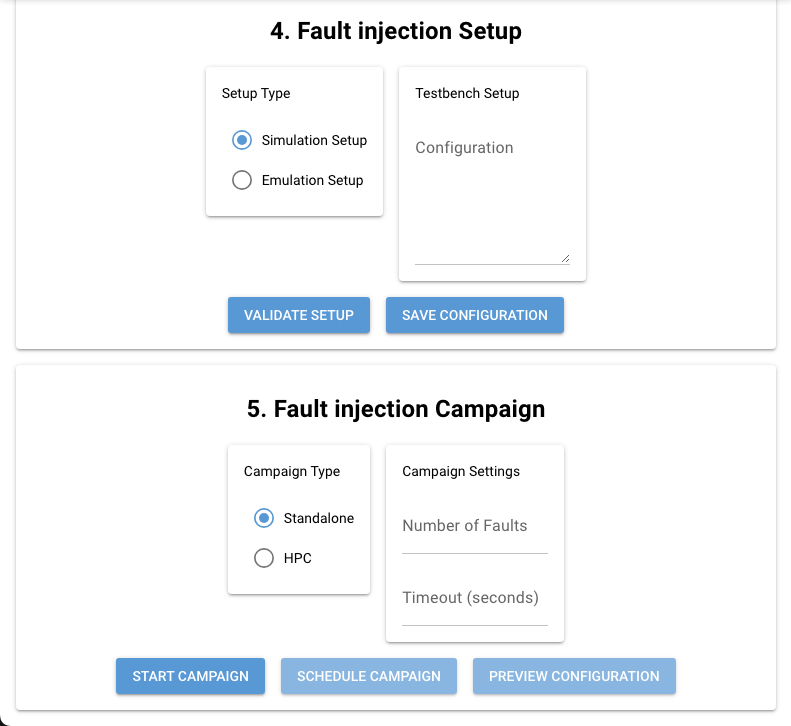
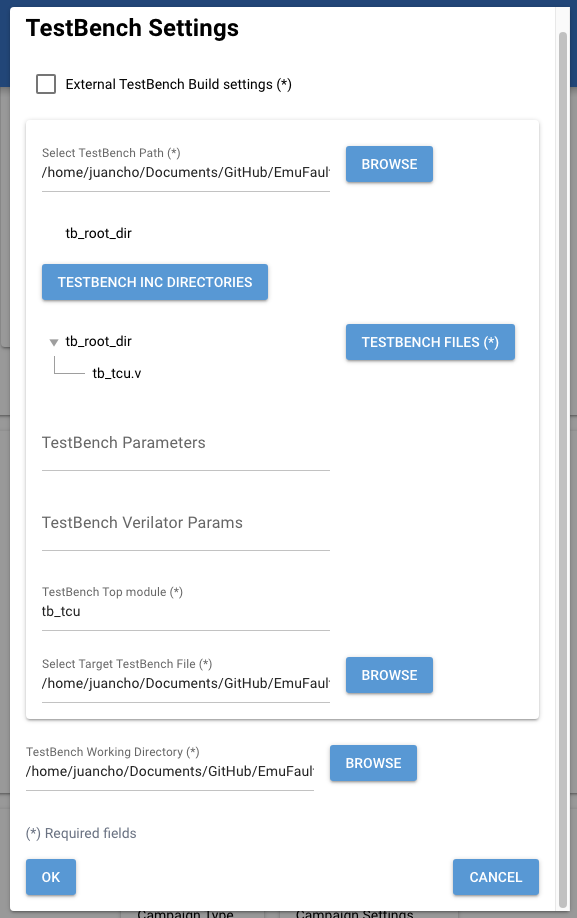
After the fault instrumentation pass, the user can enter the testbench settings as illustarted in the following picture. This will initiate the testbench compilation enabling the fault injection configuration
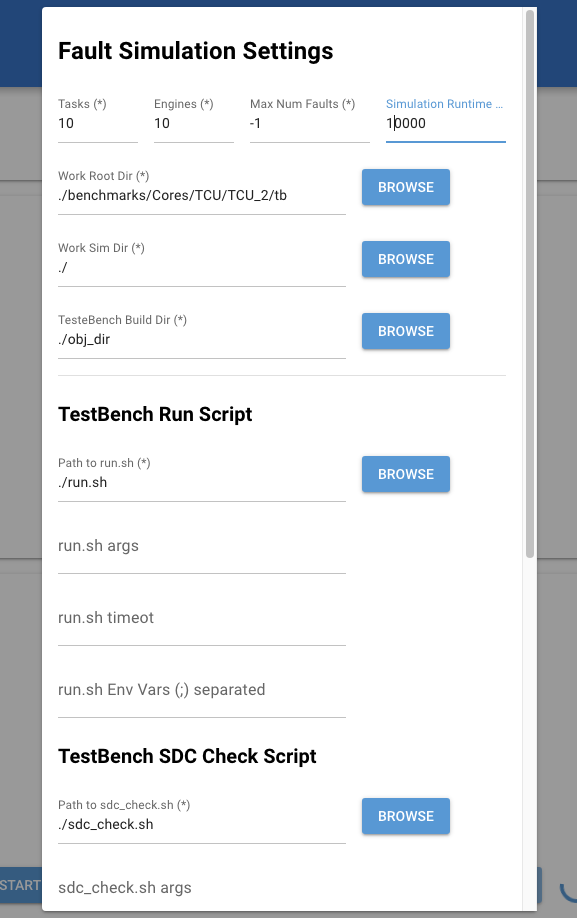
After compiling the testbench, the user must enter the fault simulation/emulation details, In this example we introduce the setting for fault simulation. Check the details in the next picture.
FInally, the user can start the fault injection process, pressing the “START CAMPAIGN” butto.
Note
The GUI is still under continous development, soon we will release a more detailed tutorial on different benchmarks and configuration